|
Fantastic Chinese New Year resources available on our website. Latest addition - our cheeky monkey to celebrate the Year of the Monkey - 2016.
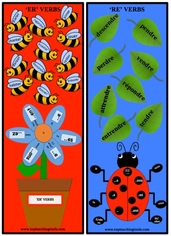
Make your own monkey craft for Chinese New Year, year of the monkey or just for fun. Includes coloured and black and white versions. All Chinese New Year Resources here Lovely designs for revising French ER and RE verb endings, that can be folded to make a double-sided bookmark. We recommend you laminate this resource. They make great gifts or prizes for pupils too. Simply download.
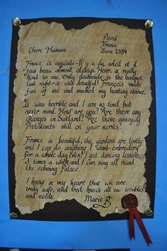
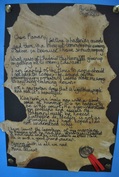
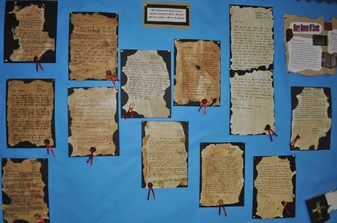
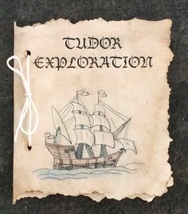
Making Aged Parchment It is a very simple process to make parchment look antique and turn them into ancient manuscripts. Follow our step-by-step guide: 1. Paper It is better to use white paper that does not have a smooth, shiny surface. Choose something with a slightly coarser texture as you will find this is more absorbent. I tend to use sketchbook-style paper. 2. Burn the Edges for an authentic look (the best part!) Always take the greatest care when combining fire and paper! I recommend this part is done before the staining. I prefer to use matches but a lighter would work equally well. Candles can be used but try not to drip wax onto the paper as this will repel the tea/coffee liquid later. Warning - have a jug of water nearby and ready to extinguish the fire if necessary. Ask someone to help you - this process really needs two people, one to hold the paper steady and the other to be in charge of the fire lighter. If you are doing this for a school project, ask an adult to help so that you don't burn the house down! Keep the match pointing upwards and the paper held slightly above. Simply set fire to the very edge of the paper and immediately blow it out. Do this all the way around the edge of the paper. Do not let the fire burn too much otherwise you will find you have very little paper left! The scorch marks leave a very good effect too. If you don't fancy using fire, simply rip the edges of the paper for a rough finish. 3. Crumple it up I do not always do this, as it depends on what I am making and if I want a more even look, but crumpling the paper gives it a lot more texture when it soaks up the tea or coffee stain. 4. Tea or Coffee Mix I normally add about 2-3 tablespoons of instant coffee to a half mug of warm/hot water. Stir it with a spoon and allow the coffee to dissolve. Obviously the less water you use, the stronger the mixture. I always soak 3 or 4 teabags in the same water too, as the teabags are also handy later. Let the liquid cool a little. If I am making this with my class, we increase the amount of water, tea and coffee accordingly. 5. Colouring the Paper - two alternatives a) In class, we simply use the teabags to rub the paper in the liquid, wiping the teabag across the paper gently, to leave a lovely brown-stained colour. It is essential to cover every part of the paper, including the edges. The children really enjoy this as it's lovely and messy! b) Alternatively, flatten out the sheet and lay it in a roasting dish or other container. Then pour over your tea/coffee stained water. It shouldn't take very long for it to soak in. 6. Dry it out.
Carefully lift your parchment and leave on a dry table in a well-ventilated room or in the sunshine. Do not use newspaper to place it on or on a radiator as it leaves marks. If you are not in the classroom and have access to an oven, then place it on a baking tray for a couple of minutes on a low temperature. 7. Writing on your parchment - do this once your paper is dried out. Your paper is now ready to use. Perfect for making scroll manuscripts, or as an aged parchment. Practise writing in black ink onto it. It is best to leave the writing part to the end of the paper staining process, to avoid smudged ink. It is possible to print on the parchment without a problem. Print at the end of the process to avoid the ink smudging in the coffee/tea staining process Have fun and please email me photos of your results! |
WELCOME TO THE TOP TEACHING TOOLS BLOGAuthorI am a teacher and love to make teaching resources. Categories
All
|
|
|







 RSS Feed
